Let's be honest – those charming vintage teddies might be hiding more than just childhood memories. Chances are your beloved bear has accumulated quite a lot over the decades, from ancient dust to rather dubious stuffing materials like wood wool or kapok. Whilst they're absolutely treasured collectibles, proper cleaning requires a gentle touch and quite specific kit.
You'll want to gather some essentials: soft brushes (the sort you'd use for delicate fabrics), white microfibre cloths, and mild cleaning solutions. I'm rather particular about spot-testing first – perhaps try a tiny patch underneath the arm where it won't show. Different materials need different approaches, especially with older bears that might have mohair or early synthetic fur.
For ongoing care, I've found natural deterrents brilliant – pop a cedar block nearby, and those pesky moths won't dare come near. When it comes to storage, don't just bung your bear in any old box. Proper acid-free tissue paper is worth every penny for preserving these furry bits of history. Mind you, there's rather more to keeping vintage bears pristine than just giving them the occasional dust – though that certainly helps!
Key Takeaways
Caring for Vintage Teddy Bears: A Collector's Guide
I'm rather amazed at what lurks inside old teddy bears – it's not just the obvious dust and fluff one might expect. These cherished chaps need a proper once-over with a soft brush, and I've found that gentle hoovering works wonders, especially around those tricky joints.
The stuffing in pre-1950s bears can be particularly troublesome. Wood wool and kapok were common back then, and they're terribly sensitive to damp. Best to keep your bears in a dry spot, away from radiators and direct sunlight.
Moths can be absolute blighters when it comes to vintage bears, though there's no need for harsh chemicals. I'm quite partial to popping a few cedar blocks nearby, and lavender sachets work brilliantly too. They'll keep the little pests at bay without risking damage to your precious collection.
Those glass eyes and metal joints need a keen eye – they're forever working loose. Regular checks could save you a small fortune in repairs later on. Mind you, it's worth spending a bit on maintenance rather than facing a costly restoration job down the line.
When it comes to stubborn marks, don't just dive in with cleaning solutions. Always test a tiny patch first, and stick to specialist wool detergent diluted properly. Some of these old bears are quite delicate, and the wrong cleaning method could spell disaster.
Understanding Your Vintage Bear's Materials

Getting to Know Your Old Bear's Make-Up
Before you tackle any cleaning, it's rather important to work out what your vintage teddy is actually made from. If you've got one from the early to mid-1900s, chances are it's covered in mohair or synthetic plush. The really old Victorian beauties often turn up with real fur or wool – quite posh for their time!
Have a gentle feel of your bear's coat; mohair's quite lovely and silky under your fingers and tends to hold up rather well, whilst those synthetic versions feel a bit rougher.
Inside your furry friend, there's quite a variety of stuffing to consider. The older chaps, particularly pre-1950s, might be packed with wood wool, kapok or even straw – bit problematic when they get wet, I must say.
More recent bears typically have polyester or cotton wool filling. Mind the joints as well – those vintage bears often sport metal disk joints or cardboard ones, and neither's particularly fond of moisture.
As for the eyes, you might find anything from boot buttons to glass or plastic ones, and each needs its own special care.
Oh, and if you're lucky enough to have a bear with its original label – perhaps from the likes of Merrythought or Chad Valley – do be extra careful to keep it safe during cleaning. Those labels are proper treasures in themselves!
Essential Cleaning Tools
Looking after vintage teddy bears properly means having the right tools for the job.
I've found a decent soft-bristled brush is absolutely essential – you'll want both an upholstery brush and what we call a baby brush (those wonderfully gentle ones meant for wee ones' hair).
White microfibre cloths are brilliant too, as they let you spot any dodgy colour bleeding straightaway.
When it comes to the fiddly bits, cotton buds are invaluable, though don't bother with those rubbish ones from the pound shop.
A small hoover with the right attachments works wonders, and I wouldn't be without my set of tweezers for getting at bits stuck in awkward spots.
Rather useful too is a proper magnifying glass – ideally one of those posh ones with LED lights built in.
Oh, and don't forget some muslin cloths and distilled water in a spray bottle. Best avoid tap water, mind – the lime scale can leave nasty marks on old fabric.
Keep the lot in a proper tool box if you can, preferably one with different sections.
Helps keep everything ship-shape and stops cleaning products getting mixed up between jobs.
Though I must admit, mine's not quite as organised as it should be!
Spot Testing Before Deep Cleaning

When restoring vintage teddy bears, there's one golden rule you simply can't skip – spot testing. Much like checking if your favourite jumper will run in the wash, you'll want to test your cleaning method somewhere discreet first. A tiny patch under the arm or on the bear's bottom should do the trick.
Pick a spot about the size of a 5p coin and carefully dab on your chosen cleaning solution with a cotton bud. Keep a watchful eye out for any worrying signs – the colour bleeding, fabric going weak, or the fur becoming matted. This isn't something to rush through; leave your test patch alone for a full day.
And if you're dealing with something rather special, like an old Steiff or precious Merrythought from the 1920s, it's worth being extra cautious.
Different materials can be properly temperamental, mind you. Most old bears are a proper mix of fabrics and stuffings – that lovely mohair might behave entirely differently from synthetic plush, and don't get me started on vintage kapok filling.
Should anything look off – perhaps the colour's gone funny or the fibres have turned brittle – you'll need a different approach altogether. After all, there's nothing more heartbreaking than watching your cherished bear's fur dissolve simply because you were too eager to crack on with the cleaning.
Removing Surface Dust
Tackling surface dust on your beloved teddy isn't terribly difficult, though you'll want to be gentle about it. Gather a few bits and bobs first – I've found those cheap makeup brushes from Boots work a treat (the soft-bristled ones for about £2), along with a handheld hoover with adjustable suction and a decent lint-free cloth.
Natural light makes all the difference, so pop yourself near a window where you can properly see what you're dealing with. Spread a clean white sheet underneath – trust me, it helps spot any bits that fall off – and brush following the natural direction of the fur. Rather like grooming a cat, really, though perhaps with more care.
Take your time with it, especially around those fiddly seams where dust tends to lurk. If you're battling with particularly stubborn dust, the hoover might help, but do be careful. Keep it about an inch away from the fur and pop an old pair of tights over the nozzle – brilliant for catching any loose threads or stuffing that might try to escape.
Mind you, if you're working with something particularly special, like a vintage Merrythought bear, you might want to stick to brushing. Better safe than sorry with those old treasures.
Treating Stubborn Stains

Getting Tough Stains Out of Old Bears
Those beloved vintage teddies can be right troublemakers when it comes to stubborn marks and stains. Before diving in with any cleaning, you'd be wise to do a sneaky test on a hidden bit – tucked away under an arm usually does the trick.
For those really bothersome spots that just won't shift, mix up a gentle solution of wool detergent and lukewarm water (roughly one part to four). Dab away carefully with a clean white cloth – and I do mean dab, not rub, or you'll end up with a rather sorry-looking bear.
Some older stains might need a few goes before they finally surrender.
Grease marks? A dusting of cornflour left overnight often sorts them right out. Though if you're up against properly stubborn oily patches, it's worth splashing out £8 on proper dry cleaning solution from somewhere like Lakeland.
Whatever you do, steer well clear of household cleaners or bleach – absolute rubbish for vintage bears and they'll wreck the poor thing's fur and stuffing.
Best to let your teddy dry naturally too – radiators and sunshine are definitely not your friends here.
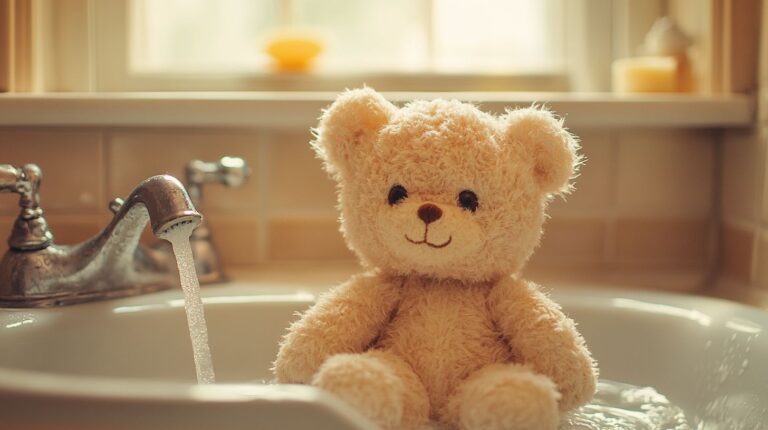
Drying Your Teddy Bear
Drying Your Teddy Bear
Getting your beloved teddy properly dry is crucial – it's often the difference between preserving a treasured companion and ending up with matted, misshapen fur. After washing, give your bear a gentle squeeze to remove excess water, but whatever you do, don't wring or twist the fabric. That's a surefire way to ruin those endearing features you've grown so fond of.
The best approach is to wrap your teddy snugly in a clean white towel, rather like you might bundle up on a chilly morning in Cornwall. Press carefully to soak up the moisture, switching towels whenever needed.
Steer clear of the tumble dryer – vintage bears especially can't handle that sort of heat, which might melt old adhesives or damage delicate materials. Pop your bear on a fresh towel somewhere airy instead, keeping well away from radiators and direct sunlight.
While it's drying, you'll want to give the fur a gentle fluff now and then with your fingers. It's oddly satisfying work, and it keeps the fur from clumping together – particularly important if you're dealing with mohair.
For those extra-special bears – perhaps that priceless Steiff handed down through generations – a small fan on its lowest setting can help move the air about and speed things along a bit. Just be sure to keep checking on your furry friend throughout the process.
Restoring Shape and Fluff

Once your bear's nearly dry, you can work on restoring its natural charm and fluffiness. Start by carefully fluffing the fur using a soft-bristled brush – gentle circular motions work brilliantly, rather like giving your favourite teddy a proper salon treatment. Do be extra gentle around those delicate facial features and tiny paws.
Those frustrating matted bits might need a bit more attention. A metal pet comb with wide teeth usually does the trick, but there's no rush – vintage mohair and plush deserve patience and care.
If you notice the stuffing's gone rather lumpy (quite typical with 1950s bears, bless them), massage the body carefully to smooth things out. Particularly flat spots might benefit from a quick blast with the hairdryer on cool, though mind you keep it a good 20 centimetres away from the fabric.
Sometimes a bear needs a proper plumping up. If yours looks a bit deflated, you might want to pop a bit of fresh stuffing through any existing seams. Traditional kapok is spot-on for those lovely pre-1960s bears, whilst newer chaps tend to fare better with polyester filling.
Mind you choose the right sort for your particular bear's vintage – it makes all the difference to how they sit and cuddle.
Storage for Vintage Bears
Proper storage really does make all the difference when it comes to keeping vintage teddy bears in tip-top condition. These cherished old chaps need a controlled environment – somewhere that's not too hot or cold, and definitely away from those pesky sunny windowsills that'll bleach their fur.
You'll want to aim for about 18-21°C, with humidity hovering around 50%. Those damp corners in the attic? Absolutely not – they're asking for trouble with mould.
Whatever you do, don't make the common mistake of sealing your bear in plastic. The poor thing needs to breathe! Instead, give it a gentle wrap in acid-free tissue paper before popping it into a proper archival box.
If you've got quite the collection, resist the temptation to stack them like tins of beans – you'll end up with squashed bears sporting wonky arms and legs. For those particularly special specimens (perhaps that rare Steiff worth hundreds of quid), it's worth donning cotton gloves when handling them.
A few silica gel packets tucked into the storage box will help keep dampness at bay, though you'll need to swap them out twice yearly.
Rather fond of natural solutions? Cedar blocks or lavender sachets work brilliantly at keeping moths and other uninvited guests away from your bears. Just remember to keep these fragrant deterrents from touching the fur directly – no bear wants to be cuddling up to a lavender bag, after all.
Preventing Future Damage
Looking After Your Vintage Bears
Regular checks are vital if you want to keep your treasured bears in tip-top condition. I've found a quick weekly inspection works wonders – it's amazing how often you'll spot a dodgy seam or those dreaded moths before they wreak havoc.
| Threat Level | Warning Signs | What to Do |
|---|---|---|
| Critical | Active moths/beetles | Pop straight in freezer at -18°C |
| High | Wobbly joints/split seams | Take to specialist repairer |
| Moderate | Dusty coat | Gentle brush-down |
| Low | Matted fur | Careful grooming |
| Minimal | Sun bleaching | Pop on UV covers |
Keep the little chaps well away from radiators – at least 30cm should do it. Direct sunlight's equally bothersome for vintage materials, so a shady spot is best. If you've got particularly precious bears, it's worth investing in a dehumidifier to maintain optimal humidity (somewhere between 45-55% usually does the trick).
Those glass eyes can be proper trouble – they've got a habit of working loose over time, and replacing them isn't cheap. Last time I checked, specialist shops were charging upwards of £50 for a matching pair. Rather clever idea to snap photos every few months, actually – helps you spot any gradual changes you might otherwise miss.
Conclusion
These old teddies are quite remarkable – properly looked after, a bear from the early 1900s could set you back a couple of thousand quid at auction these days. Mind you, they're rather delicate souls compared to their modern cousins, so you'll need to be rather vigilant with the upkeep. A spot of careful cleaning now and then, tucked away properly from dust and those pesky moths, and your woolly companion should keep its charm for ages to come. Brilliant investments, really, but only if you're prepared to give them the tender loving care they deserve.